


What?
Installing an empegWhen?
New Years' Eve 2003/04. Which was really, really cold.Why?
I have an . It seemed silly not to install it in the car.How?
This project largely involved kneeling around in freezing gravel.To elaborate: I wanted to install the empeg, a Linux-based in-car mp3 player, into my car, a 1995 Jaguar XJR. I all sounds so simple, stated like that. However, there's a few things to bear in mind:
- The empeg is purely a head unit: it has no amplifier
- The only sane place to tap into the car's speaker lines is behind the dashboard
- The only place to mount a separate amplifier is in the boot
- Jaguars are full of stuff
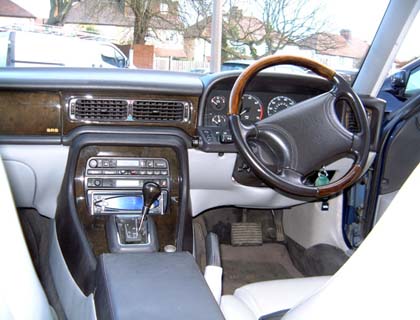
The first step was to remove the existing Jaguar stereo system. Because it's Jaguar, this was nothing so simple as sticking a couple of bent coat-hangers in some holes and pulling, oh no. It in fact involved a process that started at the central glovebox, continued through the ashtray and worked it's way round to the "ski slope" of veneer that surrounds the centre console. Only when all this was out of the way could the head unit be removed, and promptly buried at the bottom of a cupboard. The CD changer was slightly easier as it only required two bolts to be removed, but in future I should really remember to eject the disk cartridge before removing the power connections(!).
Once the old kit was out of the way, we could start on the new. Starting at the front of the car, a fascia adaptor was fitted to the dashboard such that the DIN-sized empeg unit would fit snugly into the odd-sized Jaguar stereo cutout. Similarly, a wiring harness adaptor hooked the empeg's ISO lines to the vehicles wiring loom - the rest of the empeg's connections being attached to the relevant points.
With the head unit loosely in place, we then attached the signal and speaker cables, and began the process of routing these back through the vehicle. This was fairly straightforwards as far abck as the ashtray, then it got a bit complicated. Because Jaguar seem to have an infinite supply of wire, they stuff it into every available nook and cranny. This makes it hard to find space they haven't already filled up with wire, but we just about managed. Then it was a case of threading the wires along the transmission tunnel between the udnerlay and the carpet (using a bent coat hanger and the occasional swear-word), and into the rear fuse boxes. The line-level signals for the amplifier run down the driver's side, the speaker and amplifier remote control cables down the passenger side; this should reduce interference.
With the cables dangling out of the rear doors, it seemed like a good point to stop and remove the rest of the interior trim. We took out the rear seat (discovering a large cache of broken glass and a two pound coin, one of which was more welcome than the other), removed the parcel shelf and dismantled three of the door panels (this to allow the installation of up-rated front drivers, and replace one of the rear ones). It's surprising how many cows go into upholstering one of these things - good job I'm not a vegetarian.
With the rear trim out of the way, the cables were routed around the chassis up to the sub-woofer cutout above the boot. With a bit of judicious Dremel-ing (it's a verb, honest) and some grommets, this let us pass all the wires down into the boot. It also provided the observation that Jaguars are infinitely more comfortable to sit in when you fit the seats.
In the boot, we were faced with the fairly straightforwards task of mounting the amplifier, and the slightly more complex task of hooking up all the cabling. I fashioned a mounting plate from a sheet of MDF, and then had the pleasure of laying upside down in the boot with my legs in the air, trying not to drop a heavy chunk of aluminium on my head whilst squinting through a shower of sawdust - it's character building, I tell you.
Hooking up the signal and speaker cables was fairly easy, the harder part was getting power to the amplifier. Fortunately, the battery is next to the spare wheel in this car, and thus should be quite accessible. It's also the size of a small house, and attached with wires which wouldn't look out of place in a power station. The necessitated some fairly hefty fuses, as well as enormous gold-plated terminal posts. As the amplifier is theoretically capable of drawing fifty amps, it also required some fairly thick cable - about 1cm in diameter! This was routed round past the fuel tank and up to the amplifier, then concealed behind one of the interior panels.
Reassembly, as they say, was the reverse of removal. In practical terms this meant that the car did eventually fit back together, and in fact several parts fit back together noticeably better than they did when the car left the factory. There's not so much as a single squeak or rattle to be heard anywhere. The sound system has been working happily for many months, providing stunning audio quality and an impressive selection of tunes to choose from. The only slight quibble might be with the bass response, but plans are afoot to add another amplifier and a sub-woofer - though it's not a high priority.
Since the initial install, I have upgraded the front tweeters (vast improvement over the stock parts), and also built and installed a tuner kit for the empeg. All in all, it's probably taken about ten man-days (if you consider this term offensive, please go and lay down) to install, at a theoretical cost in the thousands of pounds - all well worth it!